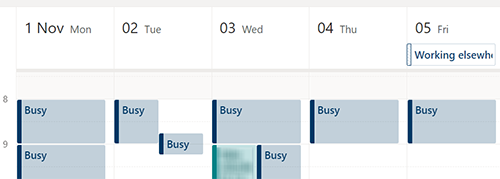
When you make a calendar entry, i.e. an appointment or a meeting (appointment or meeting: see Microsoft’s own manual for making a calendar entry), its status information is shown in the calendar as reserved by default (busy).
All members of the same organization will be able to view your calendar, but with the default settings, they will only see the time and status of entries in your calendar (not the meeting room, but the status ;)). If you wish, you can share your calendar entry at the title level or with all of your information to a specific person or even to the entire organization. (Microsoft’s Share your calendar instructions).
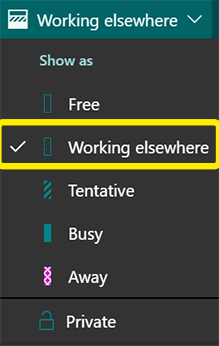
You can change the status of a single calendar entry either at the time of creating the entry, or afterwards when you open the meeting entry in edit mode. Change the status to be displayed for the calendar entry in the meeting toolbar. If you work remotely or are on a business trip, choose Working Elsewhere as the status label.

The options available are
- Free
- Use this when you want to show that you are available for the duration of the entry.
- Working Elsewhere
- Use this when you are on a business trip or on a remote job. You can make an all-day calendar entry for these days.
- Tentative
- Use this when you want to show that your participation is possible, but you may be available for something more important.
- Busy
- This is the default, and means that you are busy, and it is not worth suggesting other appointments for you at this time.
- Away
- Use this when you are not at work, i.e. holidays, balance-free and your own expenses should be marked like this.
Private is an additional entry that you can use in conjunction with any of the above modes. It is a good idea to use it for more private calendar entries (e.g. occupational health visits) if you have shared your calendar more openly with the entire organization or some other members of your organization: With Private, you can hide the title and content of the calendar entry from all other users, including those to whom you have otherwise shared your calendar.
Other users’ remote work entries are most clearly visible directly on their calendars
In all Outlook calendar assignment views, the remote work entry is not visible directly at all (e.g., a calendar assignment in the online version of Outlook calendar made directly through one’s own calendar: then the calendar of people added to the booking incorrectly claims that the person would be available even if he or she had a remote work entry), or it stands out very weakly. For example, in the Schedule Assistant view, the remote job entry has a different filling pattern, but the contrast is not very good and the entry may be difficult to detect. In this case, the user must bring the mouse to the calendar information being viewed, in which case the information will appear in the schedule assistant. However, the most obvious information about the remote work markup can be seen directly by looking at the person’s calendar.
Therefore, if you want to invite a specific person to an on-site meeting, check separately the situation of that particular person either
A) in a schedule assistant by placing the mouse cursor in the person’s calendar line at the desired point,

B) open the person’s calendar, where the remote work entries are clearly visible. Note also that entries made for the whole day appear in the first row of the calendar view, not in the time view.
